Answering your question about upgrading interior spaces with cedar, these cedar wall panels offer durable, knot-free warmth ideal for feature walls, saunas, and living areas. Best for homeowners seeking a natural scent, a tidy finish, and a rustic-modern vibe without heavy cabinetrywork. The top picks here are chosen for solid cedar quality, easy installation, and suitability for interior walls. The following buyer guide highlights five cedar options and helps you compare thickness, length, and coverage at a glance.
| Product | Coverage | Thickness | Best For |
|---|---|---|---|
| Western Red Cedar Wall Panels, 3.5″ Wx16-55″ L (21 SF) | 21 sq ft | Standard 3.5″ width boards | |
| Western Red Cedar Wall Panels, 3.5″ Wx16-55″ L (10.5 SF) | 10.5 sq ft | Standard 3.5″ width boards | |
| Cedar Tongue and Groove Wall Panels – ½” Thick (12mm) Western Red Cedar, 3 ft Long | 9.7 sq ft | ½” (12mm) | |
| Cedar Tongue and Groove Wall Panels – ½” Thick (12mm) Western Red Cedar, 7 ft Long | 10.32 sq ft | ½” (12mm) | |
| Cedar Tongue and Groove Wall Panels – ½” Thick (12mm) Western Red Cedar, 4 ft Long | 10.6 sq ft | ½” (12mm) |
Western Red Cedar Wall Panels 3.5″ x16-55″ — 21 SF

Product highlights: Canadian red cedar boards of varying lengths from 16″ to 55″, totaling 21 square feet. High-density cedar with minimal knots and a natural, aromatic finish. The boards are sourced from sustainable Canadian forests and are chemical-free, making them safer for family spaces. This option is best for a full-panel accent wall, living room feature, or entryway with a continuous cedar look. Caution: long planks require careful handling and precise alignment during installation to maintain a seamless appearance.
Western Red Cedar Wall Panels 3.5″ x16-55″ — 10.5 SF
Product highlights: A smaller box with 16″–55″ boards covering 10.5 square feet. Like the larger version, these are Canadian red cedar from sustainable forests, with a knot-free, natural wood look and a fragrant smell. Choose this for compact spaces, alcoves, or a partial wall installation where you want consistent cedar texture without overwhelming the room. Limitation: the reduced area may require more seams to cover larger walls.
Cedar Tongue and Groove Wall Panels – ½” Thick, 3 ft Long (9.7 sq ft)
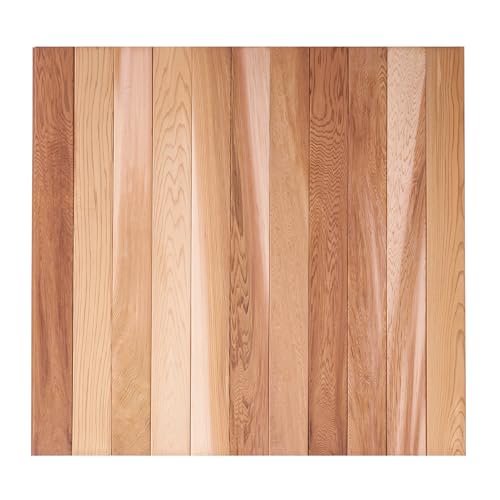
Product highlights: 12mm thick solid cedar, significantly thicker than common ¼” planks, designed to resist warping in humid environments such as bathrooms and saunas. Tongue and groove edges allow flush alignment and easy tool-assisted installation. Best for feature walls where thickness and depth convey a premium, architectural wood look. Best for: long-term durability in damp spaces. Limitation: heavier panels may require more robust mounting hardware and careful handling during installation.
Cedar Tongue and Groove Wall Panels – ½” Thick, 7 ft Long (10.32 sq ft)

Product highlights: 12mm thick cedar planks, designed for horizontal, vertical, or diagonal layouts. The 7-foot length minimizes seams on long walls and is well-suited for ceilings and feature panels. The tongue-and-groove system ensures seamless connections, ideal for clean, modern interiors that still celebrate natural wood. Caution: the longer length may require additional handling space and precise cutting to achieve clean joints.
Cedar Tongue and Groove Wall Panels – ½” Thick, 4 ft Long (10.6 sq ft)
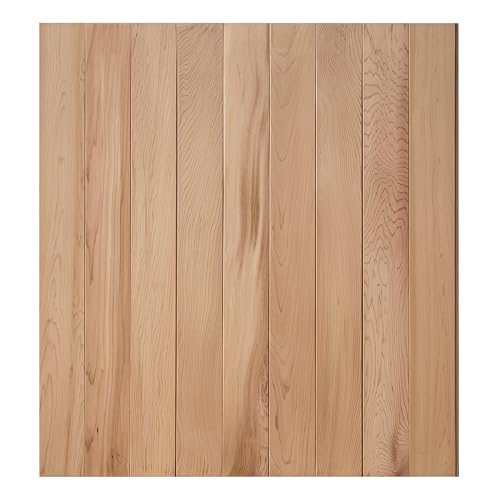
Product highlights: 12mm cedar planks, with a length of 4 feet for moderate wall spans. The ½” thickness provides a robust feel and is compatible with pneumatic nailers, brad guns, and standard nails. The tongue-and-groove design supports flush joints for a refined appearance. Best for versatile installations across walls, ceilings, and accent panels. Limitation: same species, but ensure you have the proper tools for long cuts and flush joints.
Buying Guide: Key Considerations For Interior Cedar Plank Walls
- Thickness and durability: Choose 12mm (½”) planks for humid areas or high-traffic walls to resist warping and delamination. Thicker boards feel sturdier and hold fasteners more securely.
- Installation method: Tongue and groove panels offer flush joints and easier alignment. Peel-and-stick or adhesive-backed panels can simplify DIY projects but may not be as durable over time in high-humidity spaces.
- Coverage and layout: Calculate wall area to determine how many packs you need. Longer boards reduce seams on large walls, while shorter lengths may require more cuts and joints.
- Wood origin and safety: Look for cedar sourced from sustainable forests. Natural cedar contains essential oils that resist moisture and decay and typically requires no chemical treatments.
- Aesthetic and aroma: Cedar provides a natural warm tone and a pleasant cedar aroma. Knot-free boards offer a cleaner, modern look, while some boards may display natural grain variations for a rustic feel.
- Ventilation and moisture: For bathrooms or saunas, prioritize thicker boards with solid construction and proper sealing to minimize cupping and warping. Consider sealed or finished cedar to limit moisture absorption where appropriate.
- Maintenance: Regular dusting and occasional re-sealing (if finished) help preserve the look and extend life. Avoid harsh chemical cleaners that may affect the wood’s natural patina.
Frequently Asked Questions
- What is the best cedar thickness for interior walls? – 12mm (½”) thickness is preferred for durability and moisture resistance in many interiors and damp spaces.
- Are tongue-and-groove panels easier to install than flat boards? – Yes. Tongue-and-groove edges create flush joints and typically enable a quicker, neater finish with fewer gaps.
- Can cedar panels be used in living rooms and bedrooms? – Yes. Cedar adds warmth, aroma, and a natural look suitable for living areas and bedrooms when finished appropriately.
- Is cedar safe for families with allergies? – Cedar is a natural, chemical-free option when panels are untreated. Ensure proper ventilation during installation.
- Should I seal cedar panels? – Sealing is optional but can help protect against moisture in humid spaces. For areas with high humidity, choose sealed or finished panels and follow care guidelines.
- How many cedar panels do I need for a wall? – Measure the wall area and account for board width, length, and an allowance for cuts. Add extra for mistakes or future replacements.